
The Roadrunner scooter comes with hidden P-Settings that control certain performance and display functions. Adjusting these can affect how your scooter behaves, so it’s important to follow the steps carefully.
Accessing the P-Settings
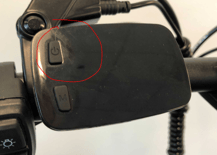
Step 1: Power on the scooter using the power button on the top left of the LCD.
.png?width=262&height=185&name=download_image%20(1).png)
Step 2: Enter the menu by holding both the power button and the M (Mode) button for 1–2 seconds.
.png?width=290&height=208&name=download_image%20(2).png)
You’ll now see the P-Settings screen, which looks like this:
Navigating the P-Settings
-
The menu includes P1, P2, P3 (and sometimes more depending on the model).
-
To move between settings, tap the power button while the “P number” (e.g., P1, P2) is flashing.
Changing a P-Setting Value
-
Once you’ve chosen a P-Setting, tap the Mode button to switch the flashing selection from the “P number” to the smaller number in the bottom-right corner.
-
To increase the value, tap the power button.
-
⚠️ There’s no direct way to decrease the number—you’ll need to keep cycling forward until it rolls back to the lowest value.
-
-
To save your changes, hold the power button until the P-number flashes again.
Exiting the P-Settings
-
Save and exit: Hold the power button again to return to the main menu.
-
Exit without saving: Hold the Mode button—your P-Settings will stay as they were when you entered.
⚠️ Important Note on Defaults
All default P-Settings are highly recommended. If you or a customer are experiencing performance issues and your P-Settings have been changed, resetting them to the defaults may resolve the problem.