
The Rubber Ducky is a fun scooter accessory that doubles as a quirky light-up decoration. This guide walks you through what’s included in the kit and how to install it securely on your scooter’s handlebars.
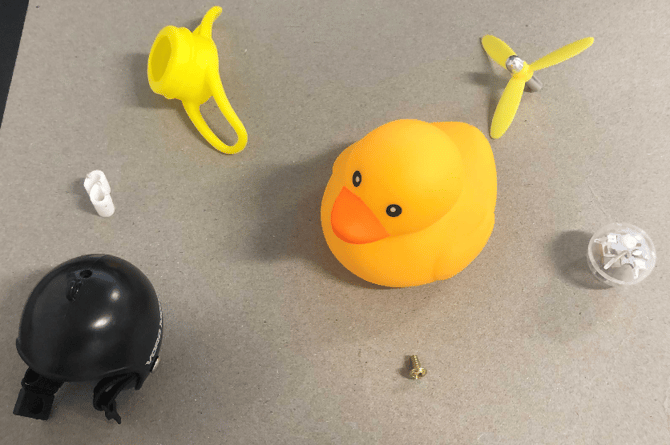
🛍️ What’s in the Bag?
-
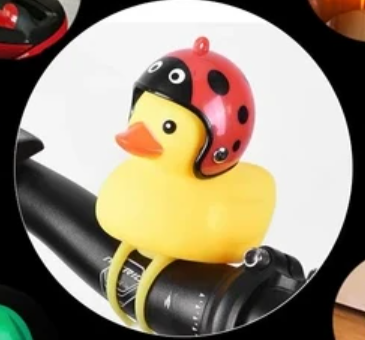
Rubber Ducky
-
Helmet
-
Bottom cap
-
Propeller
-
Light-up ball
-
S-shaped plastic piece
-
Small screw (M3×6mm)
💡 Step 1: Add the Light-Up Ball
-
Insert the light-up ball into the rubber ducky from the bottom opening.
-
Ensure it stays seated properly inside the duck.
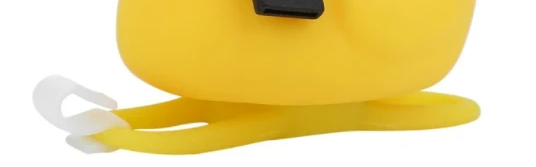
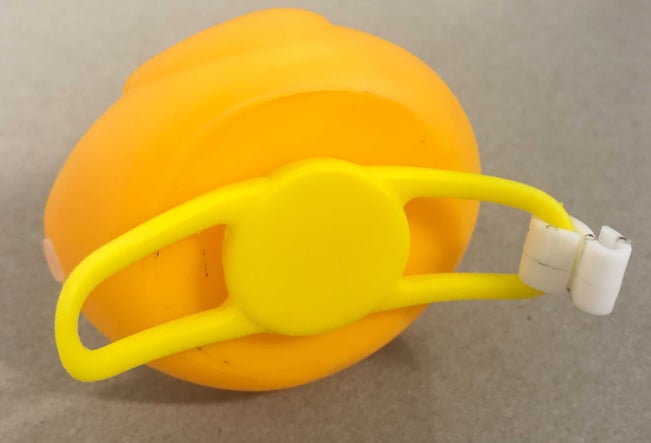
⚙️ Step 2: Prepare the Bottom Cap
-
Attach the S-shaped plastic piece to the bottom cap.
-
Tip: Start with the thinner end—it’s easier to secure first.
-
-
Insert the bottom cap into the hole at the base of the duck.
-
Ensure the handles are facing outward and the cap is snug.
-
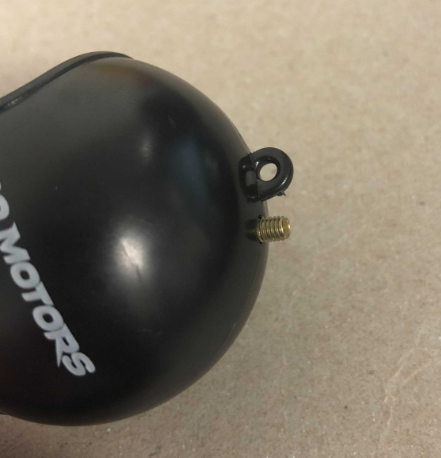
⛑️ Step 3: Assemble the Helmet & Propeller
-
From inside the helmet, place the M3×6mm screw through the top hole.
-
Position the propeller on top of the screw.
-
Tighten by turning the propeller clockwise until secure.
-
Place the helmet on the duck, making sure it sits correctly so the duck “can see.”
🛴 Step 4: Mount the Duck on Your Scooter
-
Position the ducky on the scooter’s handlebar.
-
Wrap the bottom cap slings around the bar.
-
Use the S-shaped piece to lock the slings together.
-
This keeps the ducky firmly attached and prevents it from slipping off.
-
✅ Final Check
-
Confirm the duck lights up.
-
Make sure the helmet and propeller are secured.
-
Double-check that the bottom cap and slings hold the duck steady on your handlebar.
Now your scooter has some extra personality—and visibility—with your newly installed Rubber Ducky! 🦆✨