
How to Replace Your Scooter Controller
If your scooter controller needs to be replaced, don’t worry — the process is straightforward if you take it step by step. This guide will walk you through removing the seat, identifying the correct controller, swapping it out, and reinstalling everything safely.
👉 Video Tutorial: Watch here
1. Removing the Seat
The controllers are located under the seat, so you’ll need to remove it first.
-
Remove the screws under the seat.
-
Once the screws are out, lift the seat off to reveal the controller wiring underneath.
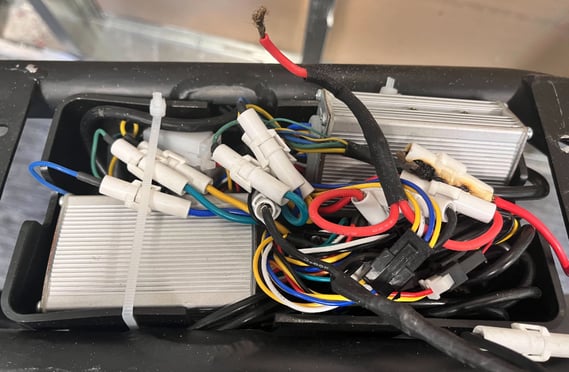
2. Identifying Which Controller to Replace
Your scooter has two controllers: one for the front motor and one for the rear motor.
-
Follow the motor wires (green, blue, yellow):
-
If they lead to the rear motor, it’s the rear controller.
-
If they lead to the front motor, it’s the front controller.
-
-
Size difference:
-
The rear controller is longer.
-
The front controller is shorter.
-
-
If you’re replacing both, simply repeat the steps for each.
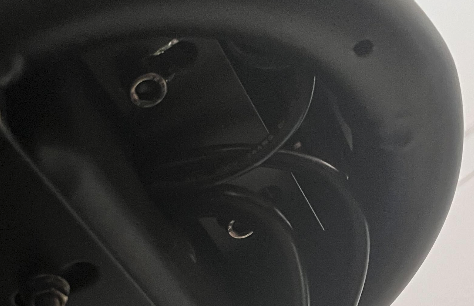
Here’s an example of what the controller looks like (this one shows signs of burn damage):
3. Removing the Old Controller
⚠️ Safety First: Turn the scooter off and unplug the battery before doing anything.
-
Cut or remove any zip ties holding the controller in place.
-
Take detailed photos of the wiring before you disconnect anything. This will help you reconnect everything correctly later.
-
Pull out the controller so the wiring is more visible. Take a few more photos from different angles.
-
Start unplugging the wires one by one until the controller is free.
-
Repeat if you are replacing both controllers.
4. Installing the New Controller
-
Begin plugging the wires into the new controller, following the photos you took.
-
Most connectors and wire colors should match up.
-
-
Place the new controller in the same spot as the old one.
-
Tuck the wires back into place.
-
It doesn’t need to look exactly the same as before, just make sure the seat will fit back on without pinching wires.
-
-
Secure the controller with a new zip tie so it doesn’t move around during use.
5. Reattaching the Seat
-
Place the seat back over the controllers.
-
Double-check that no wires are sticking out.
-
Screw the seat back into place.
And that’s it! Your controller replacement is complete. 🎉
1. Controller Fault – Error Code E001
If your display shows E001, it usually means one of your controllers is faulty.
-
Unfortunately, the scooter can’t tell you which controller is bad. In rare cases, both may need replacement.
-
To narrow it down, try the hand-roll method:
-
Turn the scooter off.
-
Try rolling the rear wheel by hand.
-
If the wheel has heavy resistance, the motor may need replacement.
-
If the wheel spins freely, the controller is likely the problem.
-
⚠️ If both wheels feel about the same, we may need to send you one controller at a time to see which fixes the issue.
2. Burned, Melted, or Cut Wires
If you notice damaged wiring, do not ride the scooter.
-
Please take clear photos of the damaged area and send them to us.
-
If the damage is on controller wiring, the entire controller would need to be replaced.
-
Wires attached to a component cannot usually be replaced separately.
3. Concern About Unplugged Wires
Sometimes customers notice a wire that isn’t connected.
-
On the Roadrunner, there is one wire that is meant to stay unplugged:
-
On the rear controller, a white/black wire branches off a white/white wire — this should remain unplugged.
-
-
If you see anything else unplugged, please send us a photo. We can confirm if it needs reconnecting and help with wiring diagrams if needed.
4. Scooter Not Reaching Top Speed
If your Roadrunner feels slower than expected, keep in mind:
-
Weight matters: Top speed is rated with a 150 lb rider, flat terrain, and a full battery. Heavier riders will naturally see a lower max speed.
-
Battery level: The scooter won’t hit top speed on a low charge.
-
Normal example: A 180–200 lb rider reaching ~29 mph instead of 34 mph is expected.
Steps to Check:
-
Tire Pressure: Inflate both tires to 45 PSI (even though the sidewall says 36 PSI). This makes a big difference.
-
Battery Charge: Always charge until the green light comes on. Lower voltage = lower speed.
-
Test Without a Rider: Place the scooter on a stool/chair and throttle it up.
-
If it reaches top speed with no rider, the scooter is working as expected.
-
If it only hits ~23 mph even without a rider, a controller replacement may help.
-
5. Damaged Pins
Sometimes issues come from a loose or bent connector pin.
If you find a damaged pin:
-
Usually, the best fix is to replace the whole component.
-
However, if you’re comfortable with basic wiring, you can replace the pin yourself:
DIY Pin Replacement Steps
-
Cut the wire just below the damaged pin.
-
(If the wire is too short, the entire part must be replaced.)
-
-
Strip the plastic cover off the end of the wire to expose the copper.
-
Use fine wire cutters for small wires.
-
-
Attach the new pin:
-
Place the wire into the pin.
-
Close the top flaps of the pin so they grip the copper wire.
-
Close the bottom flaps so they secure the insulation.
-
-
Tug test: Give it a light pull — it should hold firm.
-
Reconnect and test. If it works, the repair is complete.
✅ Following these steps should help diagnose or fix the most common Roadrunner scooter issues. If you’re unsure at any point, we recommend reaching out with photos or a short video so our tech team can advise.