
Step-by-Step Setup with Images
When setting up your EMOVE Roadster, your package should include:
-
Front Controller x1 (labeled Front-wheel drive)
-
Rear Controller x1 (labeled Rear-wheel drive)
-
Y-Splitter Cable x1
-3.png?width=298&height=224&name=1280X1280%20(1)-3.png)
Step 1: Position the Controllers
Place the controllers inside the deck in the correct orientation:
-2.png?width=387&height=290&name=1280X1280%20(2)-2.png)
Step 2: Connect the Y-Splitter
-
Locate the small black 7-pin connector on both controllers.
-
Use the Y-splitter cable to connect both controllers together.
-1.png?width=169&height=225&name=1280X1280%20(4)-1.png)
-3.png?width=279&height=209&name=1280X1280%20(3)-3.png)
-
Connect the other end of the Y-splitter to the main 7-pin connector.
Step 3: Connect the Stepdown
-
Find the orange 3-pin connectors on the controllers.
-
Use either one of these to connect to the orange 3-pin connector on the stepdown.
-
Only one controller needs to be connected.
-1.png?width=257&height=343&name=1280X1280%20(5)-1.png)
-
Step 4: Ignore the 4-Pin SMT Connectors
These are not required for the Roadster installation.-3.png?width=380&height=285&name=1280X1280%20(6)-3.png)
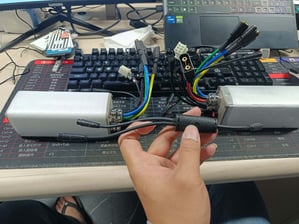
Step 5: Connect the Battery
Attach the battery connectors to the large black QS8 connectors.-3.png?width=206&height=275&name=1280X1280%20(7)-3.png)
Step 6: Connect the Motor Hall Sensor
Plug the motor hall sensor into the large white 6-pin connector.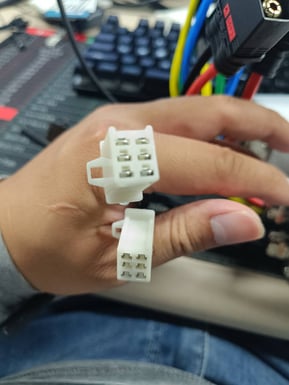
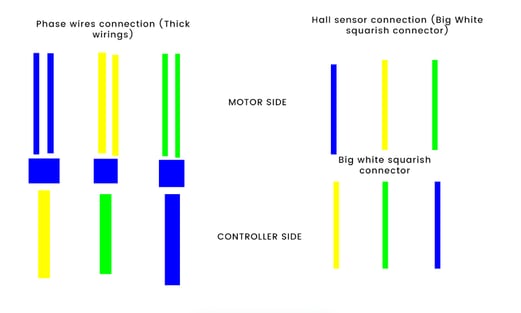
Step 7: Connect the Motor Phase Wires
Match the motor phase wires by color coding for proper alignment.
✅ Once everything is securely connected, your EMOVE Roadster dual controllers are properly installed and ready for use.